Importing data into your Salesforce org can be stressful–requiring lots of planning, mapping and testing. Yes, the real stress comes after you run the report.
Suddenly, your co-workers are complaining about the thousand extra chatter notifications they’re getting, and to-do tasks are popping up on cases that were resolved 10 years ago. Why? You didn’t turn off your automation. And, no wonder as switching if off for every import is time-consuming and error-prone. There has to be a better way!
And there is–it’s my new favorite trick and involves making Salesforce ignore automation and validation rules for the user who is performing the import. I’ll walk you through the most basic way to do this in the blog. Simply follow the four steps that I’ve detailed below to make the magic happen.
1 – Mark a User as Automation Exempt
My goal is to make Salesforce ignore automation and validation rules for the user performing the import. I’ll walk you through the most basic way to do this.
First, make a checkbox on the User object. I called it Automation Exempt in my org, so if you want to be able to copy and paste my formulas, name it the same thing.
Object: User
Field Type: Checkbox
Field Label: Automation Exempt
Field Name: Automation_Exempt
Description: This user should be excluded from automation and validation rules
Make sure to add your new field to the User page layout. Note: This checkbox can be checked temporarily on any user prior to running a data load. If you have a dedicated migration user, then you could leave it checked permanently.
2 – Create a “Do Nothing” Flow (you can do this even if you’ve never used Flow before!)
This step is an adaptation of Eric Smith’s work here.
Okay, I think this might seem complicated, but you can do it. (Note that this is a workaround. Do not use this as a template to make real flows. To make Process Builder do nothing, it needs to think that it is doing something. So, we are giving it something to do that won’t affect anything at all.)
If you don’t want to go into the flow designer at all, you can install this teeny tiny flow here to create the Do Nothing flow. It won’t break anything–it doesn’t actually do anything. As always, though, best practice is to install packages into a sandbox first (here’s the sandbox link). If you go the install route, your last step in this section will be to go to setup, search Flows, and activate your Do Nothing flow. Then you’ll be ready to jump to move to Step 3 below: Add a “Do Nothing” Step in Process Builder.
Now, we’ll start by opening the flow designer. Search for Flows in Setup Quick Find, and click on it in the sidebar. Then click the New Flow button.
Tip: If you’ve run the flow builder before, you’ll get a blank flow. If not, you might get an error message saying to download Flash. Click that link and it’ll prompt you to enable Flash from the browser.
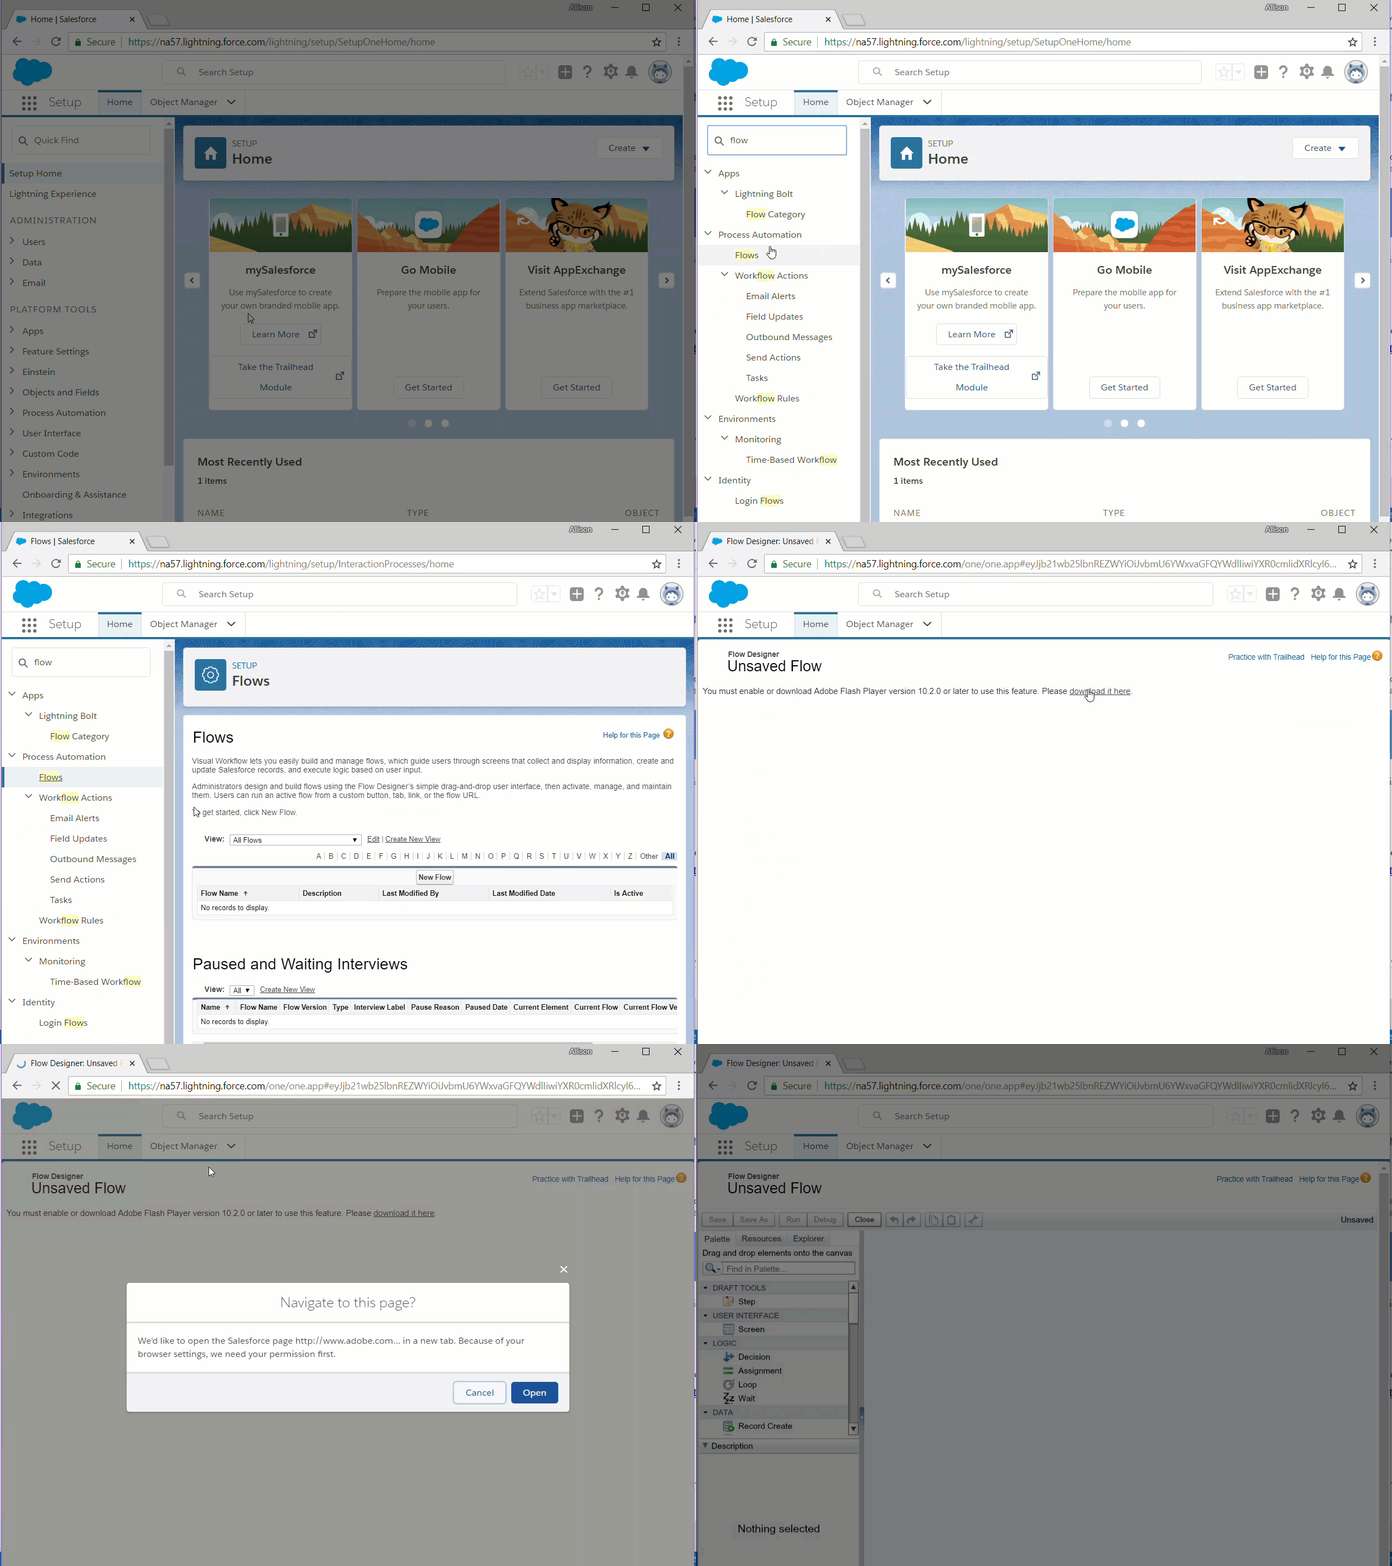
Watch the whole setup process here.
Once you see the blank flow designer, look for Assignment in the left sidebar and drag it onto the main panel. A window will pop up automatically.
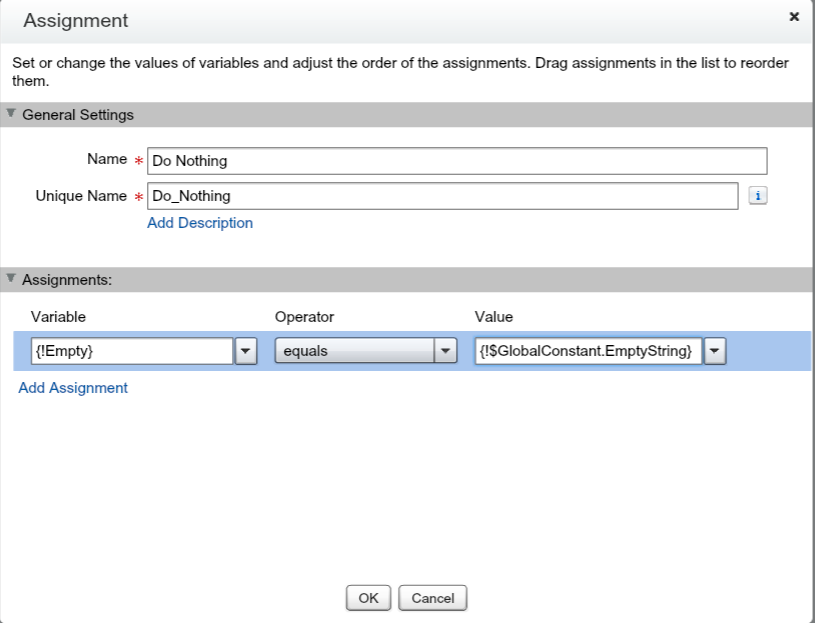
Enter the name Do Nothing. The unique name will be filled automatically.
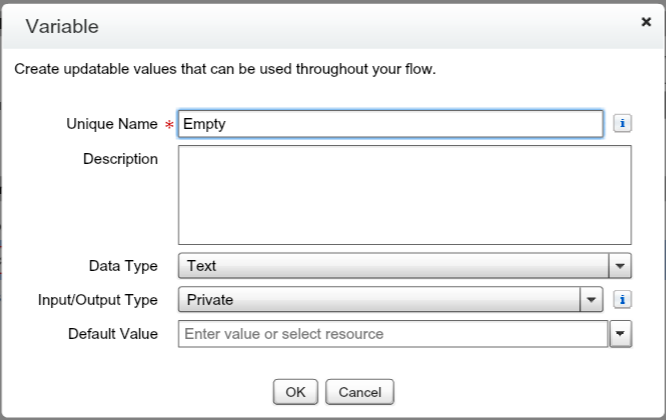
Click into the input for Variable and select Create New > Variable. Name the variable Empty and make sure that it has a Type of Text. Click OK.
You are back in the Assignment element. Select Equals as the operator, and start typing empty in the Value field. Click on $GlobalConstant. EmptyString when you see it. Click OK.
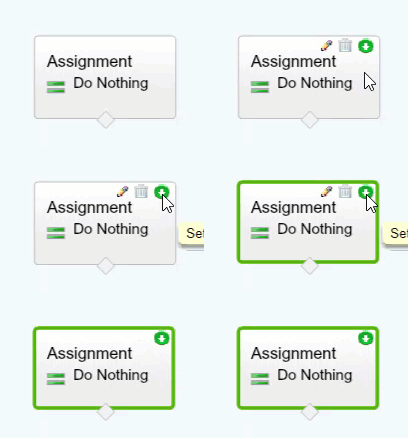
From the main panel, roll over your assignment element until you see a little green icon on it. Click that icon to set the element as your start element.
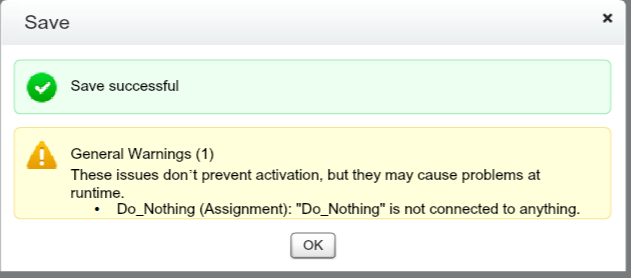
Click Save in the top left corner. Give your flow a name (such as “Do Nothing”) and add a description that will be meaningful to you (e.g., “A placeholder flow that does nothing”). You will get “Save successful” and then a yellow warning message. That is normal for this flow. Go ahead and click OK.
Click Close in the top left corner.
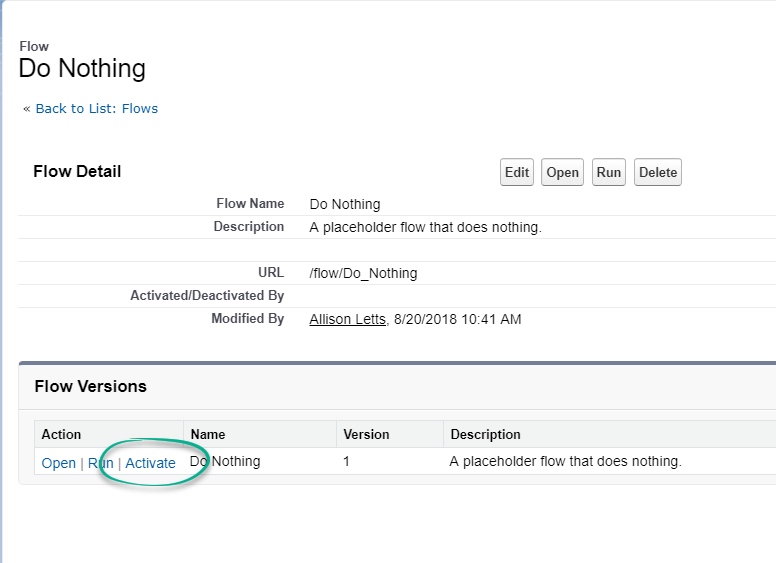
You’ll come to a page with one row. Click Activate. You’ve built a flow!
Now we’re ready to put it into practice with Process Builder.
3 – Add a “Do Nothing” Step in Process Builder
Before running your automation, check whether the user is Automation Exempt. To do that, clone your process and create a criteria node. It will start out at the bottom, but make sure you move it up before you activate the process. While your criteria can include any reason why you want to skip over automation, you must include that the user is tagged Automation Exempt. Use a formula. If you named your user field Automation Exempt, you will be able to copy this formula: $User.Automation_Exempt — otherwise, select System Variable > Current User > Automation Exempt.
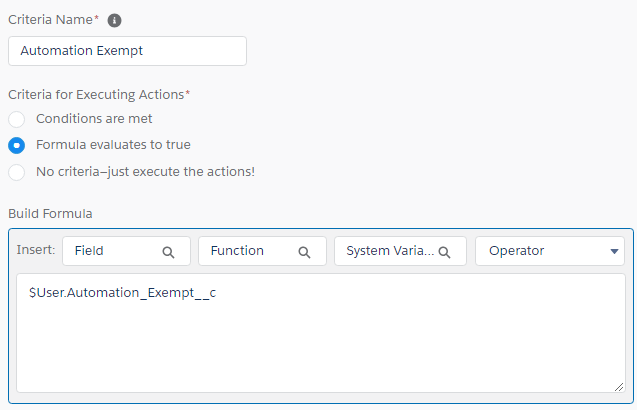
That’s it. Process Builder will look to see if Automation Exempt is checked. You don’t even need to include an IF or ==TRUE.
Now, we will call our flow. In Immediate Actions, click New. Name the action Do Nothing, and select Flow. You will see your flow in the list. If you don’t, go back to your list of flows and make sure that Do Nothing is active.
Now, we have our completed criteria node and actions. Roll over that whole section until you see the drag and drop arrows on the right side of the screen.

Drag and drop the section up to the top of your process. If there’s automation you want to have happen even during imports, just drag and drop your new section accordingly.
Rinse and repeat for all of your processes!
4 – Import with Ease
When you’re ready to import, find the user who will be running the import (quite possibly yourself, but maybe your migration user or API-only user), and check the Automation Exempt checkbox on his or her user record. When you’re done importing, you can uncheck the box. That’s it! Now, go make some magic!
_____________________________________________
Allison Letts
Senior Consultant, Salesforce Services Group
Attain Partners
Allison is an experienced, certified Salesforce Consultant for nonprofits, specializing in automation, reporting, data management, and integrations. In addition, Allison has worked for nonprofit organizations to unleash the potential of Salesforce for fundraising, including email marketing, and now brings those best practices to Attain Partners’ nonprofit clients.


